LÖVE (Love2D) 実践編・さめがめ:4.アニメーションをつける
(2019.1.12. 公開)
1. アニメーションの実装
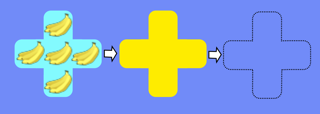
コマが消えるときにアニメーションをつけたい。まず、消すコマを一瞬光らせてから消す。そのあと、落ちるコマを動かして、所定の場所まで移動したら止める。
こういうアニメーションはどうすれば実装できるだろうか。画面の表示内容を変えるわけだから、love.draw() に手を入れる必要がある。そこで、こういう処理の流れを考える。

アニメーションが始まるのは、コマを消す時だから、love.keypressed() の中である。ここで、ある変数に「アニメーションが始まったよ」という目印をつける。同時に、アニメーションの開始時刻を記録しておく。
love.draw() の中では、「アニメーション中」の目印がついていれば、アニメーションの描画処理をする。この処理のときに、アニメーションが終了したかどうかを判断して、終了していれば、次のアニメーションに移る。love.draw() は繰り返し呼び出されるので、すべてのアニメーションが終了するまで、この処理が繰り返される。すべてのアニメーションが終了すれば、通常の処理に戻る。
2. 消すコマを光らせる
いろいろなテクニックが考えられるが、例えばこんなのはどうか。「つながったコマを表示」のときに、つながったコマの背景の色を変えて表示するようにした。これと同じ形をコマの上に重ね書きして、その色を変える。最初は透明色で、その次に明るい色(例えば黄色)にして、最後に背景と同じ色にする。こうすると、コマが一瞬光って、そのあと消えたように見えるだろう。
つながったコマの背景は show_mark() という関数で描ける。背景を描く時は、コマの絵柄を描く前にこの関数を呼び出した。上のように光らせるのであれば、コマの絵柄を描いた後にもう一度この関数を呼び出せばよい。
show_mark() の直前に love.graphics.setColor() を置けば、色を変えられる。透明色から徐々に黄色にするには、次のようにすればよい。ローカル変数 t には、「アニメーション開始時点から計った現在の時間」が入っているものとする。また、0.2 秒で黄色に達するものとする。
love.graphics.setColor(1, 1, 0, t / 0.2) -- t / 0.2 は「不透明度」
show_mark()
黄色から背景色に移行するには、次のようにすればよい。黄色は (1, 1, 0), 背景色は (0.47, 0.50, 1.00) とする。また、t が 0.2 秒から 0.4 秒の間で色が変化するものとする。
local w = (t - 0.2) / 0.2
love.graphics.setColor(1 - w * (1 - 0.47), 1 - w * (1 - 0.50), w)
show_mark()
アニメーション中であることを示す変数を is_animating として、これが1なら「光らせる」処理をするものとしよう。また、変数 tbase は、「あるアニメーションの処理を開始した時刻」を表すものとする。そうすると、love.draw() の中では、下のような処理をすればよい。
if is_animating == 1 then -- 光らせる
  local t = love.timer.getTime() - tbase  -- 経過時間
  if t <= 0.2 then
    love.graphics.setColor(1, 1, 0, t / 0.2)
  elseif t <= 0.4 then
    local w = (t - 0.2) / 0.2
    love.graphics.setColor(1 - w * (1 - 0.47), 1 - w * (1 - 0.50), w)
  else
    is_animating = 2  --  次の動作へ
    tbase = love.timer.getTime()
  end
  show_mark()
end
3. コマを下に落とす
コマを下に落とすアニメーションを描くには、次の作業が必要。
- どのコマが落ちるかを特定する。
- 経過時間から、コマがどれだけ落ちたかを決める。
- コマの位置を修正する。
- コマを描く。
まず、「どのコマが落ちるかを特定する」処理。これは、「コマを下に詰める」fill_down() 関数の中で一緒に調べればよい。簡単のため、盤面と同じサイズの is_down というテーブルを作り、ここに「何コマ分落ちるか」を書き込むことにする。
function love.load()
...
  is_down = {}  -- コマが落ちる距離(アニメーション用)
...
end

function fill_down()
  is_down = {} -- 空にする
  ...
        if y2 ~= y1 then  -- y2 == y1 の時は同じ場所だから動かさなくていい
          board[y2 * xx + x + 1] = c
          is_down[y2 * xx + x + 1] = y2 - y1  -- 動かす距離
        end
  ...
end
経過時間に対して落とす距離を決める時は、物理の「自由落下」の知識を使う。自由落下では、落ちる距離は時間の二乗に比例する。そこで、「落とす距離」を「経過時間の二乗×定数」で求めておき、それを使ってスプライトバッチ中のコマの位置を修正する。
if is_animating == 2 then -- 下に落とす
  local t = love.timer.getTime() - tbase  -- 経過時間
  local dy = t * t * 11.1  -- 0.3秒で1コマぶん落ちる
  local nf = 0             -- 落ちているコマの数
  for x = 0, xx - 1 do
    for y = 0, yy - 1 do
      local i = y * xx + x + 1
      if is_down[i] and board[i] > 0 then
        local y1 = is_down[i] - dy  -- 「落ちた後の位置」との差
        if y1 > 0 then nf = nf + 1 else y1 = 0 end
        batch:set(i, quads[board[i]], x * 32, (y + 1 - y1) * 32, 0, 1, 1)
      end
    end
  end
  if nf == 0 then
    -- 全部のコマが落ちきった
    is_animating = 3  -- 次の動作へ
    tbase = love.timer.getTime()
  end
end
4. コマを左に詰める
コマを左に詰めるアニメーションの処理も、下に落とすアニメーションとほぼ同じ。盤面と同じサイズの is_left というテーブルを作り、ここに「何コマ分左に動くか」を fill_left() の中で書き込む。
function love.load()
...
  is_left = {}  -- コマが左に動く距離(アニメーション用)
...
end

function fill_left()
  is_left = {} -- 空にする
  ...
      if x2 ~= x1 then  -- x2 == x1 の時は同じ場所だから動かさなくていい
        for y = 0, yy - 1 do
          board[y * xx + x2 + 1] = board[y * xx + x1 + 1]
          is_left[y * xx + x2 + 1] = x1 - x2  -- 動かす距離
        end
      end
  ...
end
時間に対する処理も前と同じ。水平移動の場合は等速で動かす、というやり方も可能だけど、ここでは自由落下と同じ関数を使った。
if is_animating == 3 then -- 左に詰める
  local t = love.timer.getTime() - tbase  -- 経過時間
  local dx = t * t * 11.1  -- 0.3秒で1コマぶん動く
  local ns = 0             -- 動かすコマの数
  for x = 0, xx - 1 do
    for y = 0, yy - 1 do
      local i = y * xx + x + 1
      if is_left[i] and board[i] > 0 then
        local x1 = is_left[i] - dx  -- 「詰めた後の位置」との差
        if x1 > 0 then ns = ns + 1 else x1 = 0 end
        batch:set(i, quads[board[i]], (x + x1) * 32, (y + 1) * 32, 0, 1, 1)
      end
    end
  end
  if ns == 0 then
    -- 全部のコマが落ちきった
    is_animating = 0  -- アニメーション終了
  end
end
5. アニメーションを起動するタイミングは?
注意しないといけないのが、アニメーションをどのタイミングで起動するか。処理内容を詳しく調べるとわかることだが、「光らせる」アニメーションは、「コマを消す前に」起動しないといけない。一方、「下に落とす」「左に詰める」アニメーションは、「コマを消した後に」起動する必要がある。つまり、1. で書いた流れ図を少し修正して、次のような流れにする。
- リターンキーが押されるたら、「光らせる」アニメーション開始
- アニメーションが終わったら、コマを消して、その後「下に落とす」アニメーション開始
- アニメーションが終わったら、「左に詰める」アニメーション開始
- アニメーションが終わったら、通常処理に戻る
また、「コマを消す」処理についても、再検討が必要。erase_tiles() 関数に下のようにまとめて書いていたが、アニメーションのタイミングに合わせて処理を分ける必要がある。
function erase_tiles()
  -- === 消したコマの得点を加算 ===
  point = point + (cont - 1) * (cont - 1) -- ←「光らせる」アニメーションのあと
  -- === コマを消して詰める ===
  fill_down()     -- マークされたコマを消して下に詰める ←「光らせる」アニメーションのあと
  fill_left()     -- 列を左に詰める ←「下に詰める」アニメーションのあと
  update_board()  -- 盤面を書き直す ← fill_down(), fill_left() のあとにそれぞれ必要
  mark()          -- マークを付け直す ←「左に詰める」アニメーションのあと
end
これを含めて流れ図を書くと、次のようになる。
- リターンキーが押されたら、「光らせる」アニメーション開始
- アニメーションが終わったら、得点を加算して、コマを消して下に詰めて、「下に落とす」アニメーション開始
- アニメーションが終わったら、列を左に詰めて、「左に詰める」アニメーション開始
- アニメーションが終わったら、マークをつけ直して、通常処理に戻る
「アニメーション開始」の処理を、それぞれ関数にした方が見通しが良くなる。
function start_animate_glow()
  is_animating = 1
  tbase = love.timer.getTime()
end
function start_animate_down()
  point = point + (cont - 1) * (cont - 1)  -- 消したコマの得点を加算
  fill_down()     -- マークされたコマを消して下に詰める
  update_board()  -- 盤面を書き直す
  is_animating = 2
  tbase = love.timer.getTime()
end
function start_animate_left()
  fill_left()     -- 列を左に詰める
  update_board()  -- 盤面を書き直す
  is_animating = 3
  tbase = love.timer.getTime()
end
love.draw() の中に入れる、アニメーションの処理も、関数にしておく。
-- === アニメーション1:光らせる ===
function animate_glow()
  local t = love.timer.getTime() - tbase  -- 経過時間
  if t <= 0.2 then
    love.graphics.setColor(1, 1, 0, t / 0.2)
  elseif t <= 0.4 then
    local w = (t - 0.2) / 0.2
    love.graphics.setColor(1 - w * (1 - 0.47), 1 - w * (1 - 0.50), w)
  else
    start_animate_down()   -- 次の動作へ
  end
  show_mark()
end
-- === アニメーション2:下に落とす ===
function animate_down()
  local t = love.timer.getTime() - tbase  -- 経過時間
  local dy = t * t * 11.1  -- 0.3秒で1コマぶん落ちる
  local nf = 0             -- 落ちているコマの数
  for x = 0, xx - 1 do
    for y = 0, yy - 1 do
      local i = y * xx + x + 1
      if is_down[i] and board[i] > 0 then
        local y1 = is_down[i] - dy  -- 「落ちた後の位置」との差
        if y1 > 0 then nf = nf + 1 else y1 = 0 end
        batch:set(i, quads[board[i]], x * 32, (y + 1 - y1) * 32, 0, 1, 1)
      end
    end
  end
  if nf == 0 then
    start_animate_left()   -- 次の動作へ
  end
end
-- === アニメーション3:左に詰める ===
function animate_left()
  local t = love.timer.getTime() - tbase  -- 経過時間
  local dx = t * t * 11.1  -- 0.3秒で1コマぶん動く
  local ns = 0             -- 動かすコマの数
  for x = 0, xx - 1 do
    for y = 0, yy - 1 do
      local i = y * xx + x + 1
      if is_left[i] and board[i] > 0 then
        local x1 = is_left[i] - dx  -- 「詰めた後の位置」との差
        if x1 > 0 then ns = ns + 1 else x1 = 0 end
        batch:set(i, quads[board[i]], (x + x1) * 32, (y + 1) * 32, 0, 1, 1)
      end
    end
  end
  if ns == 0 then
    -- 全部のコマが落ちきった
    is_animating = 0  -- アニメーション終了
    mark()            -- マークを付け直す
  end
end
なお、アニメーションを実行している間は、盤面が不完全な状態になっているので、キー入力を無視した方が安全だろう。
function love.keypressed(key, scancode, isrepeat)
  if is_animating ~= 0 then return end  -- アニメーション中はキー入力を無視
  ...
5. プログラム
以上を合わせたのが次のプログラム。
-- サンプルプログラム 101-04 main.lua
-- fruits32.png, ipag.ttf が必要
function set_screen_size()
  width = 640                         -- ゲーム画面の横幅
  height = 480                        -- ゲーム画面の高さ
  love.window.setMode(width, height)  -- これが効くなら問題なし
  love.window.setTitle("さめがめ on LÖVE")
  swidth = love.graphics.getWidth()   -- 実画面の横幅
  sheight = love.graphics.getHeight() -- 実画面の高さ
  transx, transy = 0, 0
  scale = 1
  if swidth ~= width or sheight ~= height then
    -- setMode が効いてない場合
    if swidth / sheight > width / height then -- 実画面の方が横長
      scale = sheight / height          -- 縦方向で倍率を決める
      transx = math.floor((swidth - width * scale) / 2)  -- 空白の幅
      transy = 0
    else
      scale = swidth / width            -- 横方向で倍率を決める
      transx = 0
      transy = math.floor((sheight - height * scale) / 2) -- 空白の高さ
    end
  end
  love.graphics.setBackgroundColor(0.82, 0.82, 0.82) -- ゲーム画面の外は灰色の枠
end

function love.load()
  --  === 画面サイズ設定 ===
  set_screen_size()                 --  画面の大きさを設定
  xx = math.floor(width / 32)       --  盤面の幅
  yy = math.floor(height / 32) - 1  --  盤面の高さ
  love.keyboard.setKeyRepeat(true)  -- キーのオートリピートを有効にする
  -- === フォント指定 (IPAゴシック 16ポイント) ===
  font = love.graphics.newFont("ipag.ttf", 16)
  love.graphics.setFont(font)
  --  === 画像関連初期化 ===
  ntiles = 5                        --  コマの種類
  tiles = love.graphics.newImage("fruits32.png") -- コマ画像を読み込む
  wid0, high0 = tiles:getDimensions()            -- コマ画像のサイズ
  batch = love.graphics.newSpriteBatch(tiles)    -- スプライトバッチ
  quads = {}                        -- Quad を保持しておくテーブル
  for i = 1, ntiles do              -- Quad をコマの種類分だけ作る
    quads[i] = love.graphics.newQuad((i - 1) * 32, 0, 32, 32, wid0, high0)
  end
  --  === 初期盤面を作る ===
  board = {}                        --  盤面
  rest = {}                         --  種類ごとの残りコマ数
  init_board()                      --  最初の盤面を作る
  point = 0                         --  得点を0にする
  --  === アニメーション処理用 ===
  is_down = {}                      --  コマが落ちる距離(アニメーション用)
  is_left = {}                      --  コマが左に動く距離(アニメーション用)
  is_animating = 0                  --  1:光らせる、2:下に落ちる、3:左に詰める
end

-- === 盤面初期化 ===
function init_board(retry)
  if not retry then
    randomSeed = love.timer.getTime() * 1000  -- タネを新しく作る(ミリ秒単位の現在時刻)
  end
  love.math.setRandomSeed(randomSeed)    -- 保存してあるタネを使う
  for i = 1, xx * yy do                  -- xx*yy 回繰り返し
    board[i] = love.math.random(ntiles)  -- ランダムにコマを配置
  end
  update_board()           -- スプライトバッチ、残りコマ数を更新
  -- === 現在位置初期化 ===
  cx = 0
  cy = 0
  mark()  -- マークをつける
end

-- === 盤面の更新 ===
function update_board()
  batch:clear()          --  スプライトバッチをクリア
  for i = 1, ntiles do   --  種類ごとの残数をクリア
    rest[i] = 0
  end
  num = 0                --  全体の残数をクリア
  for y = 0, yy - 1 do
    for x = 0, xx - 1 do
      local c = board[y * xx + x + 1] % 100 -- %100 は実は不要だが念のため
      if c == 0 then
        batch:add(quads[1], 0, 0, 0, 0, 0)  -- ダミー(表示しないスプライト)
      else
        batch:add(quads[c], x * 32, (y + 1) * 32)
        rest[c] = rest[c] + 1               -- この種類の残数を+1
        num = num + 1                       -- 全体の残数を+1
      end
    end
  end
end

-- (x, y) とつながっているコマをマークする(再帰呼び出し)
function mark_from_here(x, y)
  local c, n
  c = board[y * xx + x + 1]
  board[y * xx + x + 1] = c + 100
  n = 1
  if x > 0 and board[y * xx + x] == c then
    -- 左のマスに同じコマがある
    n = n + mark_from_here(x - 1, y)
  end
  if x < xx - 1 and board[y * xx + x + 2] == c then
    -- 右のマスに同じコマがある
    n = n + mark_from_here(x + 1, y)
  end
  if y > 0 and board[(y - 1) * xx + x + 1] == c then
    -- 上のマスに同じコマがある
    n = n + mark_from_here(x, y - 1)
  end
  if y < yy - 1 and board[(y + 1) * xx + x + 1] == c then
    -- 下のマスに同じコマがある
    n = n + mark_from_here(x, y + 1)
  end
  return n
end

-- (cx, cy) とつながっているコマをマークする
function mark()
  -- === すべてのマークを外す ===
  for i = 1, xx * yy do
    board[i] = board[i] % 100
  end
  -- === (cx, cy) にコマがあれば、そことつながっているコマをマークする ===
  if board[cy * xx + cx + 1] ~= 0 then
    cont = mark_from_here(cx, cy)  -- つながっているコマの数
  else
    cont = 0
  end
end

-- マークされているコマの位置を塗る
function show_mark()
  local r = 8
  for x = 0, xx - 1 do
    for y = 0, yy - 1 do
      local i = y * xx + x + 1
      if board[i] > 100 then
        local x1, y1 = x * 32, (y + 1) * 32
        love.graphics.rectangle("fill", x1, y1, 32, 32, r, r)
        if x > 0 and board[i - 1] > 100 then
          love.graphics.rectangle("fill", x1, y1, r, 32)
        end
        if x < xx - 1 and board[i + 1] > 100 then
          love.graphics.rectangle("fill", x1 + 32 - r, y1, r, 32)
        end
        if y > 0 and board[i - xx] > 100 then
          love.graphics.rectangle("fill", x1, y1, 32, r)
        end
        if y < yy - 1 and board[i + xx] > 100 then
          love.graphics.rectangle("fill", x1, y1 + 32 - r, 32, r)
        end
      end
    end
  end
end

-- === コマを下に詰める ===
function fill_down()
  is_down = {}
  for x = 0, xx - 1 do -- 各列について処理
    local y2 = yy - 1  -- 下から順に詰める
    for y1 = yy - 1, 0, -1 do
      local c = board[y1 * xx + x + 1]
      if c < 100 then
        -- (x, y1)のコマが生きていれば(x, y2)に移す
        if y2 ~= y1 then  -- y2 == y1 の時は同じ場所だから動かさなくていい
          board[y2 * xx + x + 1] = c
          is_down[y2 * xx + x + 1] = y2 - y1  -- 動かす距離
        end
        y2 = y2 - 1    -- これは y2 == y1 の時も必要
      end
    end
    -- 全部のコマを移し終わったら、それより上は0で埋める
    while y2 >= 0 do
      board[y2 * xx + x + 1] = 0
      y2 = y2 - 1
    end
  end
end

-- === 列を左に詰める ===
function fill_left()
  local x2 = 0
  is_left = {}
  for x1 = 0, xx - 1 do
    local c = board[(yy - 1) * xx + x1 + 1]
    if c > 0 then
      -- x1 列を x2 列に動かす
      if x2 ~= x1 then  -- x2 == x1 の時は同じ場所だから動かさなくていい
        for y = 0, yy - 1 do
          board[y * xx + x2 + 1] = board[y * xx + x1 + 1]
          is_left[y * xx + x2 + 1] = x1 - x2  -- 動かす距離
        end
      end
      x2 = x2 + 1       -- これは x2 == x1 の場合も必要
    end
  end
  -- 全部の列を詰め終わったら、それより右は0で埋める
  while x2 < xx do
    --  空にする
    for y = 0, yy - 1 do
      board[y * xx + x2 + 1] = 0
    end
    x2 = x2 + 1
  end
end

function love.keypressed(key, scancode, isrepeat)
  if is_animating ~= 0 then return end  -- アニメーション中はキー入力を無視
  local dx, dy = 0, 0
  if key == "right" then      -- 右矢印キーが押されている
    dx = 1
  elseif key == "left" then   -- 左矢印キーが押されている
    dx = -1
  elseif key == "up" then     -- 上矢印キーが押されている
    dy = -1
  elseif key == "down" then   -- 下矢印キーが押されている
    dy = 1
  elseif key == "return" then -- リターンキーが押されている
    if cont > 1 then          -- 2つ以上連続したコマがある
      start_animate_glow()    -- アニメーション開始
    end
  elseif key == "r" then      -- "R" キーが押されている
    init_board(true)          -- 盤面の初期化(前回と同じ盤面)
    point = 0                 -- 得点をリセット
  elseif key == "n" then      -- "N" キーが押されている
    init_board()              -- 盤面の初期化(新しい画面)
    point = 0                 -- 得点をリセット
  end
  if dx ~= 0 or dy ~= 0 then
    -- 新しい位置を計算する。画面からはみ出したら、反対側から出てくる
    cx = (cx + dx) % xx
    cy = (cy + dy) % yy
    mark()  -- マークをつけ直す
  end
end

function start_animate_glow()
  is_animating = 1
  tbase = love.timer.getTime()
end

function start_animate_down()
  point = point + (cont - 1) * (cont - 1)  -- 消したコマの得点を加算
  fill_down()     -- マークされたコマを消して下に詰める
  update_board()  -- 盤面を書き直す
  is_animating = 2
  tbase = love.timer.getTime()
end

function start_animate_left()
  fill_left()     -- 列を左に詰める
  update_board()  -- 盤面を書き直す
  is_animating = 3
  tbase = love.timer.getTime()
end

-- === アニメーション1:光らせる ===
function animate_glow()
  local t = love.timer.getTime() - tbase  -- 経過時間
  if t <= 0.2 then
    love.graphics.setColor(1, 1, 0, t / 0.2)
  elseif t <= 0.4 then
    local w = (t - 0.2) / 0.2
    love.graphics.setColor(1 - w * (1 - 0.47), 1 - w * (1 - 0.50), w)
  else
    start_animate_down()   -- 次の動作へ
  end
  show_mark()
end

-- === アニメーション2:下に落とす ===
function animate_down()
  local t = love.timer.getTime() - tbase  -- 経過時間
  local dy = t * t * 11.1  -- 0.3秒で1コマぶん落ちる
  local nf = 0             -- 落ちているコマの数
  for x = 0, xx - 1 do
    for y = 0, yy - 1 do
      local i = y * xx + x + 1
      if is_down[i] and board[i] > 0 then
        local y1 = is_down[i] - dy  -- 「落ちた後の位置」との差
        if y1 > 0 then nf = nf + 1 else y1 = 0 end
        batch:set(i, quads[board[i]], x * 32, (y + 1 - y1) * 32, 0, 1, 1)
      end
    end
  end
  if nf == 0 then
    start_animate_left()   -- 次の動作へ
  end
end

-- === アニメーション3:左に詰める ===
function animate_left()
  local t = love.timer.getTime() - tbase  -- 経過時間
  local dx = t * t * 11.1  -- 0.3秒で1コマぶん動く
  local ns = 0             -- 動かすコマの数
  for x = 0, xx - 1 do
    for y = 0, yy - 1 do
      local i = y * xx + x + 1
      if is_left[i] and board[i] > 0 then
        local x1 = is_left[i] - dx  -- 「詰めた後の位置」との差
        if x1 > 0 then ns = ns + 1 else x1 = 0 end
        batch:set(i, quads[board[i]], (x + x1) * 32, (y + 1) * 32, 0, 1, 1)
      end
    end
  end
  if ns == 0 then
    -- 全部のコマが落ちきった
    is_animating = 0  -- アニメーション終了
    mark()            -- マークを付け直す
  end
end

function love.draw()
  -- === 描画範囲を設定 ===
  love.graphics.setScissor(transx, transy, width * scale, height * scale)
  love.graphics.translate(transx, transy) -- 原点移動
  love.graphics.scale(scale, scale) -- 拡大率を設定
  -- === 盤面を塗りつぶす ===
  love.graphics.setColor(0.39, 0.42, 0.92)
  love.graphics.rectangle("fill", 0, 0, width, 32)  -- 点数、残りコマ数など
  love.graphics.setColor(0.47, 0.50, 1.00)
  love.graphics.rectangle("fill", 0, 32, width, height - 32)  -- 盤面
  -- === スコア・残りコマ数など表示 ===
  love.graphics.setColor(1, 1, 1)
  love.graphics.print(string.format("スコア %-d", point), 4, 8)
  love.graphics.print(string.format("残り %-d", num), 120, 8)
  for i = 1, ntiles do
    love.graphics.draw(tiles, quads[i], 140 + i * 60, 0)
    love.graphics.print(string.format("%-d", rest[i]), 140 + 36 + i * 60, 8)
  end
  love.graphics.print("[R]etry [N]ew", 220 + ntiles * 60, 8)
  -- === マークの表示 ===
  love.graphics.setColor(0.39, 1, 1)  -- 水色
  show_mark()
  -- === 現在位置の表示 ===
  love.graphics.setColor(1, 1, 1)  -- 白色
  love.graphics.rectangle("fill", cx * 32, (cy + 1) * 32, 32, 32, 8, 8) -- 角丸四角形を塗りつぶす
  -- === 下に落ちる・左に詰めるアニメーション ===
  if is_animating == 2 then animate_down() end
  if is_animating == 3 then animate_left() end
  -- === コマの表示 ===
  love.graphics.draw(batch, 0, 0)
  -- === 光らせるアニメーション ===
  if is_animating == 1 then animate_glow() end
  -- === 描画範囲をリセット ===
  love.graphics.setScissor()
end